|
Introduction
Super Extended Basic on the Color Computer 3 offers four high resolution graphics modes for BASIC programmers.
|
HSCREEN 1 - 320 x 192 x 4 colors
HSCREEN 2 - 320 x 192 x 16 colors |
HSCREEN 3 - 640 x 192 x 2 colors
HSCREEN 4 - 640 x 192 x 4 colors
|
The vertical resolution of each of these modes is 192 lines. The Color
Computer 3 is capable of producing these modes with a 200 and 225 lines
resolution but BASIC has been restricted to 192. Why?
I
assume that Radio Shack wanted to maintain the 192 lines for
compatibility with the earlier Color Computers where the maximum
vertical resolution is 192 lines.
 From
a more technical standpoint, 225 lines
requires 36k (36000) bytes of RAM which meant allocating a total of 5 x
8k MMU blocks of memory. 192 lines requires 30k (30720) bytes of RAM
and therefore only required 4 x 8k MMU blocks. From
a more technical standpoint, 225 lines
requires 36k (36000) bytes of RAM which meant allocating a total of 5 x
8k MMU blocks of memory. 192 lines requires 30k (30720) bytes of RAM
and therefore only required 4 x 8k MMU blocks.
What
puzzled me was that a 200 line screen requires (32000) which also fits
in the 4 x 8k MMU blocks so why not use it? I also recalled reading
in a book some time ago that listed several POKE's to BASIC that made
320 x 200 resolution work in BASIC.
I
started wondering if 225 lines could also be coaxed to operate but
patching BASIC required a special level of expertise that I was uncertain. I decided to summon the famous Robert Gault, the Gandalf (Lord of the Rings) of the Color Computer community to cast his technical wizardry upon this challenge.
Off to work we go!
Searching
through the Super Extended Color Basic ROM disassembly, we eventually
narrowed down a set of memory locations which could be modified to
adapt BASIC's graphics commands to open the desired HSCREEN mode in
both 200 and 225 lines. BASIC uses MMU blocks 48 to 51 for the existing
192 lines and by extending it to block 52 we were able to allocate the
full 36k for 225 lines.
But
there was a problem. BASIC allocates block 52 for the HGET/HPUT buffers
and so we had to work out how this can be re-allocated. Robert located
the desired bytes in BASIC and it was now a matter of choosing a new
location. As it turns out, we were gifted with location 55 which was
officially marked as "unused by BASIC" and suited perfectly allowing the patch to be made within the memory of a 128K Color Computer 3.
Below is a table detailing the locations that need to be changed with patch values for both 200 and 225 lines.
LOCATION
TO PATCH
|
PATCH FOR
200 LINES
|
PATCH FOR
225 LINES
|
SUPER EXTENDED COLOR BASIC
ROM DISSASSEMBLY BEFORE PATCHING
|
$E06C
$E06D
$E06E
$E06F |
$35
$3E
$34
$3D |
$75
$7E
$74
$7D |
E06C 15
FCB $15 ;320 PIXELS, 4 COLORS (HSCREEN1)
E06D 1E
FCB $1E ;320 PIXELS, 16
COLORS (HSCREEN2)
E06E 14
FCB $14 ;640 PIXELS, 2 COLORS (HSCREEN3)
E06F 1D FCB
$1D ;640 PIXELS, 4
COLORS (HSCREEN4) |
| $E0EE |
NO CHANGE |
$34 |
E0EE 3D FCB BLOCK7.5 ;TASK REGISTER 1 MMU DEFAULT VALUE |
| $E6C0 |
$64 |
$70 |
E6BE CC 00 60
LDD #96 ;VERTICAL CENTER
COORDINATE |
$E87C
$E87D
$E87F
$E880 |
$E0
$FF
$B4
$F3 |
$E0
$FF
$B4
$F3 |
E87B BD B4 F3 JSR LB4F3 ;CONVERT ACCB INTO A FLOATING POINT NUMBER
E87E BD E0 FF JSR SELTASK0 ;SELECT TASK REGISTER 0
Patch to fix bug in HPOINT command.
|
$E7BA
|
$C7
|
$E1
| E7B9 C1 C0 CMPB #192 ;CHECK FOR MAXIMUM
VERTICAL COORDINATE
|
$E7BE
|
$C6
|
$E0
| E7BD C6 BF LDB #192-1 ;FORCE TO MAXIMUM
VALUE IF OUT OF RANGE |
$EB75
|
$C6
|
$E0
| EB73 8E 00 BF
LDX #192-1 ;GET THE MAXIMUM
VERTICAL COORD |
| $EF8F |
$18 |
$1B |
EF8E 86 17 LDA
#ROWMAX-1 ;GET THE HIGHEST POSSIBLE ROW NUMBER (HPRINT) |
$F521
|
$C7
|
$E1
| F51F 8C 00 C0
CMPX #192 ;IS VERTICAL COORD
WITHIN RANGE? |
$F526
|
$C6
|
$E0
| F524 8E 00 BF
LDX #192-1 ;FORCE TO MAXIMUM IF
NOT |
$E6E7
$E6E8 |
NO CHANGE
NO CHANGE |
$AC
$A0 | E6E6 8C A0 00
CMPX #BASIC ;CHECK FOR END OF THE
HI-RES GRAPHICS SCREEN
When this is changed an EXEC &HE097 should be used to force the change.
|
$E3A3
$E0D4
$E50B
|
NO CHANGE
NO CHANGE
NO CHANGE
|
$37
$37
$37
|
E3A2 86 34 LDA #BLOCK6.4 ;GET THE HPUT/HGET BUFFER BLOCK
E0D3 C6 34 LDB #BLOCK6.4 ;GET BLOCK 6.4
E50A 86 34 LDA #BLOCK6.4 ;GET/PUT BUFFER BLOCK
When this is changed a HBUFF0 should be used to force the change.
|
Patch Listings
Lines of code to activate a
16 color HSCREEN 2 mode at 320 x 225 resolution.
10 POKE &HE06D,&H7E:POKE &HE0EE,&H34:POKE
&HE6C0,&H70
20 POKE &HE87C,&HE0:POKE &HE87D,&HFF:POKE &HE87F,&HB4:POKE &HE880,&HF3
30
POKE &HE7BA,&HE1:POKE &HE7BE,&HE0:POKE &HEB75,&HE0
40
POKE &HEF8F,&H1B:POKE &HF521,&HE1:POKE &HF526,&HE0
50
POKE &HE6E7,&HAC:POKE &HE6E8,&HA0:EXEC &HE097
60
POKE &HE3A3,&H37:POKE &HE0D4,&H37:POKE &HE50B,&H37:HBUFF0
Lines of code to activate a 16 color HSCREEN2 mode at 320 x 200 resolution.
10 POKE &HE06D,&H3E:POKE
&HE6C0,&H70
20 POKE &HE87C,&HE0:POKE &HE87D,&HFF:POKE &HE87F,&HB4:POKE &HE880,&HF3
30
POKE &HE7BA,&HC7:POKE &HE7BE,&HC6:POKE &HEB75,&HC6
40
POKE &HEF8F,&H18:POKE &HF521,&HC7:POKE &HF526,&HC6
Both
assume that you are patching an unpatched version of BASIC. If you wish
to change between several modes, you need to keep track of what you're
patching and restore any patch points that may need to set their original defaults.
If
you wish to use another HSCREEN mode other than HSCREEN2 then change
the first POKE in line 10 to the corresponding video mode as listed in
the first row of the table above.
For example, if you wish to use HSCREEN
4 with 4 colors and 225 lines then line 10 of the 225 line patch listing above will become...
10 POKE &HE06F,&H7D:POKE &HE0EE,&H34:POKE
&HE6C0,&H70
And of course, set the appropriate HSCREEN mode after applying the patches.
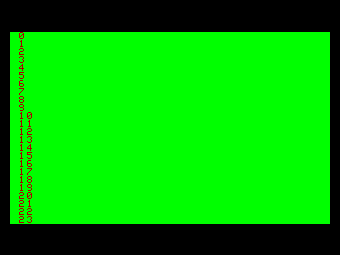
Unpatched 320x192 screen with 24 text lines.
|
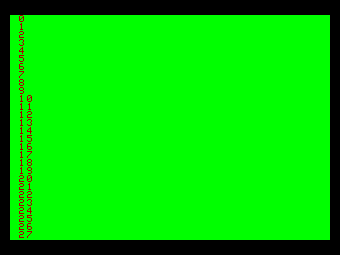
Patched 320x225 screen with 28 lines of text.
|
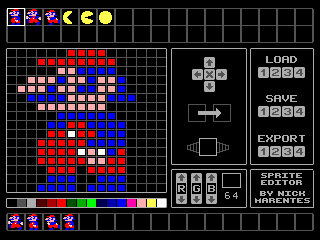
The real test
To see how well BASIC's commands have been adapted to the 225 lines, I
created a simple Sprite Editor in BASIC running in the 320x225x16 color
mode. This is a tool that I can use for the creation of games. It is
restricted to 16x16 graphic sprites as larger sprites are more of a CPU
burden on the Color Computer and so 16x16 is a good compromise.
There are commercial Sprite Editors on the PC and MAC that could be
used but using them instead of using the Color Computer itself goes
against what I perceive as the spirit of retro computing. :)
I also wanted to implement the new Hires Mouse Interface from the previous project installment on this website.
Download and unZIP the program DSK here: SPEDITOR.DSK
Mount the DSK on your CoCo (CoCoSDC, DriveWire or transfer to a real floppy
disk). The program will also work in an emulator such as VCC or MESS
although the Hires Mouse Interface driver will not work at full
precision but it will still be usable.
RUN"EDITOR" to start the program.
LOAD and SAVE
The program will begin with no sprites created. To load a few sample
sprites, move your mouse to LOAD on the right hand side of the screen
and click on 1. This will load a few sprites into the top sprite frames of the screen.
You can load any 1 of 4
sprite files each containing up to 34 sprite definitions by clicking on
the numbers 1 to 4. Make sure you SAVE any new and currently displayed
sprites that you create using the equivalent SAVE option below because
each LOAD overwrites the currently displayed sprite definitions.
The program will prompt you for confirmation before you LOAD or SAVE. Just answer Y or N to continue.
EXPORT
The EXPORT option below the SAVE option is reserved for future
expansion of the program. Depending on the application intended to use
the created sprites, extra BASIC code can be added to export the sprite
data in a form required by the application. Currently this option does nothing since there is no expansion
code inserted.
Editing Window
After loading the sample sprites you will see the sprites displayed in
the top area of the screen. One of those sprites will be highlighted in
a bright white border frame and it is magnified in the editing window
below. You can choose another sprite by clicking on it.
Once you have chosen a color to draw with, you merely click on the
squares in this window to draw and color a sprite. The changes are
reflected on the selected sprite in the top sprite frames.
Palette Table and RGB Color Edit
Below the magnified sprite editing window is the current 16 color
palette table and immediately to the right of this is a window that
allows you to set the RGB components of the currently selected color.
When you click on any of the 16 colors in the palette table, this
becomes the selected color and is displayed in this RGB window.
You can then increase or decrease the RGB components of that color by
clicking on the arrows for each RGB component. To have any changes made
to the default startup palette colors available next time you start the
program, you need to edit the BASIC line of code at the end of the
program (line 895) and re-save the program with your new palette colors.
The area just above the RGB color editing window has three functions...
Sprite SHIFT and CLEAR
The top cursor pad icon allows
you to shift the sprite within it's frame. The X in the middle clears
the sprite to all color 0 (black).
COPY
The second icon copies the currently selected sprite to another sprite
frame or the animation frames explained below. Clicking here changes
the screen border to blue then clicking on another space resets the
screen border to black and the sprite is copied.
ANIMATION
The icon below COPY is the Animation icon.
Step one is to copy sprite frames
from the top sprite frames down to the sprite frames at the bottom of the screen in the order you wish to
cycle through each sprite, starting from the leftmost frame to the
right.
Clicking on the animation icon then changes the screen border
to green symbolizing for you to click on the last frame the animation
will play in the animation sequence. Then it begins playing the sprite
animation. Press and hold the mouse/joystick button to stop the
animation.
As a test, copy the Mario sprites (counting 1 to 3 from the left) from the top
area of the screen to the animation strip in the order 3,2,3,1 and set
to animate.
The program should be easy to follow from here.
Another project completed
Hopefully this program shows the benefits of a larger 225 lines
screen... another feature that was always available in the Color
Computer 3 Basic but hidden away and unused for so long.
I hope this project also highlights the power and usefulness of Super
Extended Basic. It's a very capable language that I often use for
creating tools such as this for when I am developing an Assembly
Language game. Basic is much slower than Assembly Language but is quick
and easy to create programs in.
This project also highlights the use of the previous project, the Hires Mouse Interface being used from Basic within a graphical user environment.
|